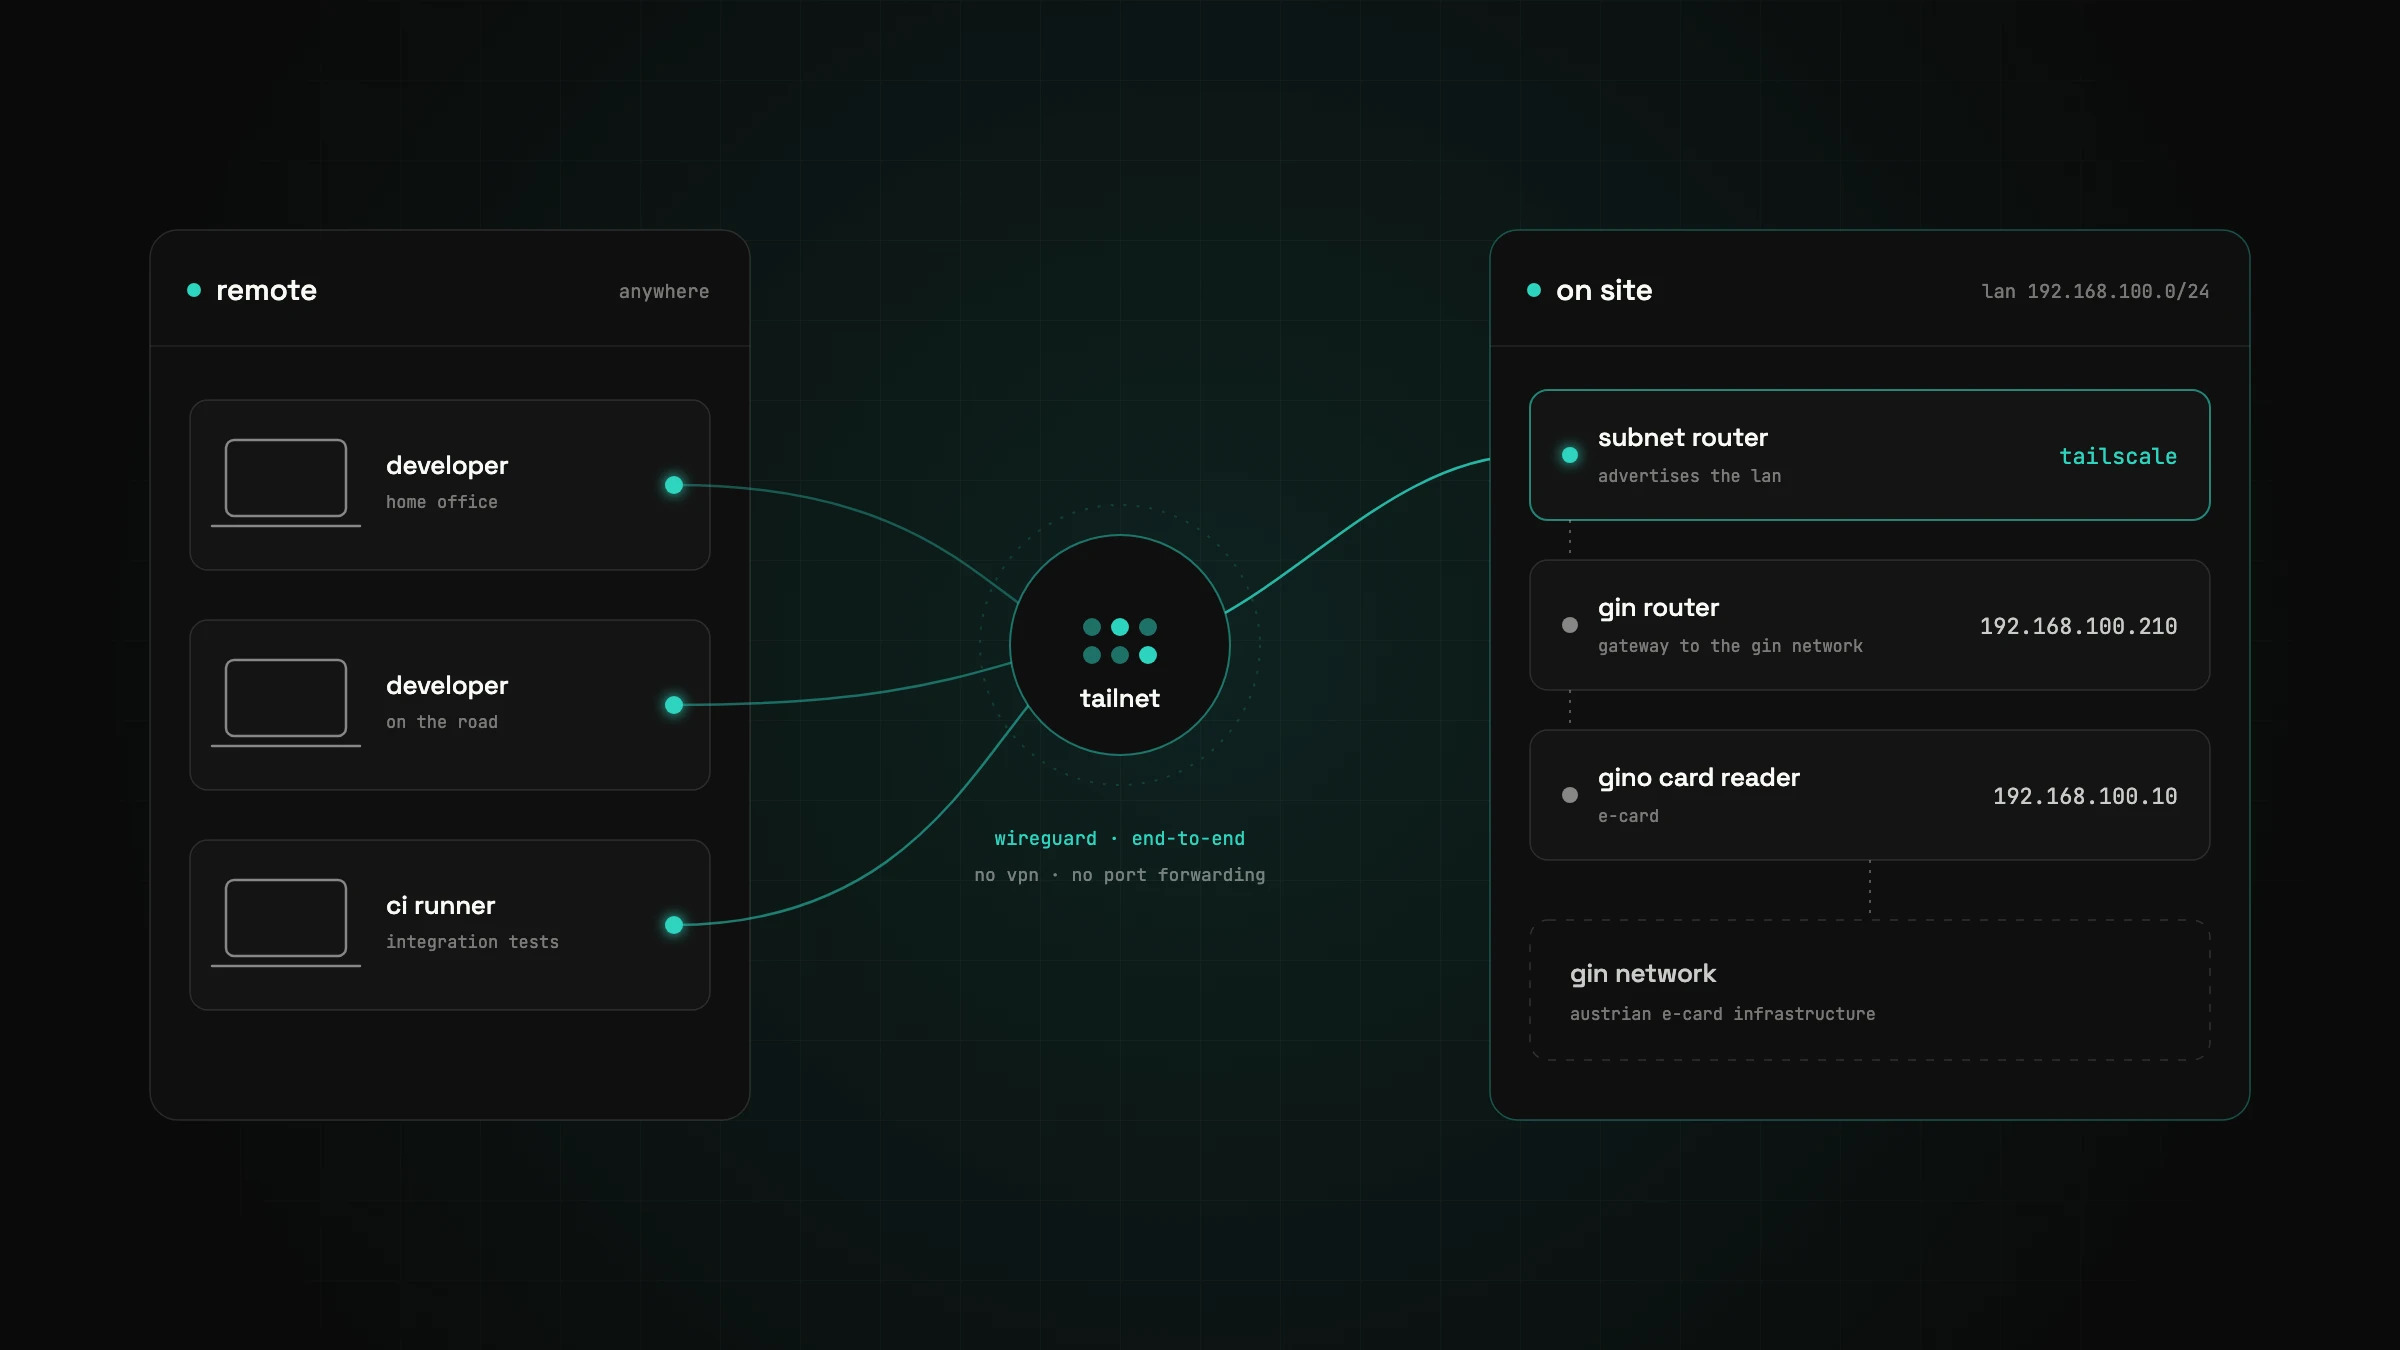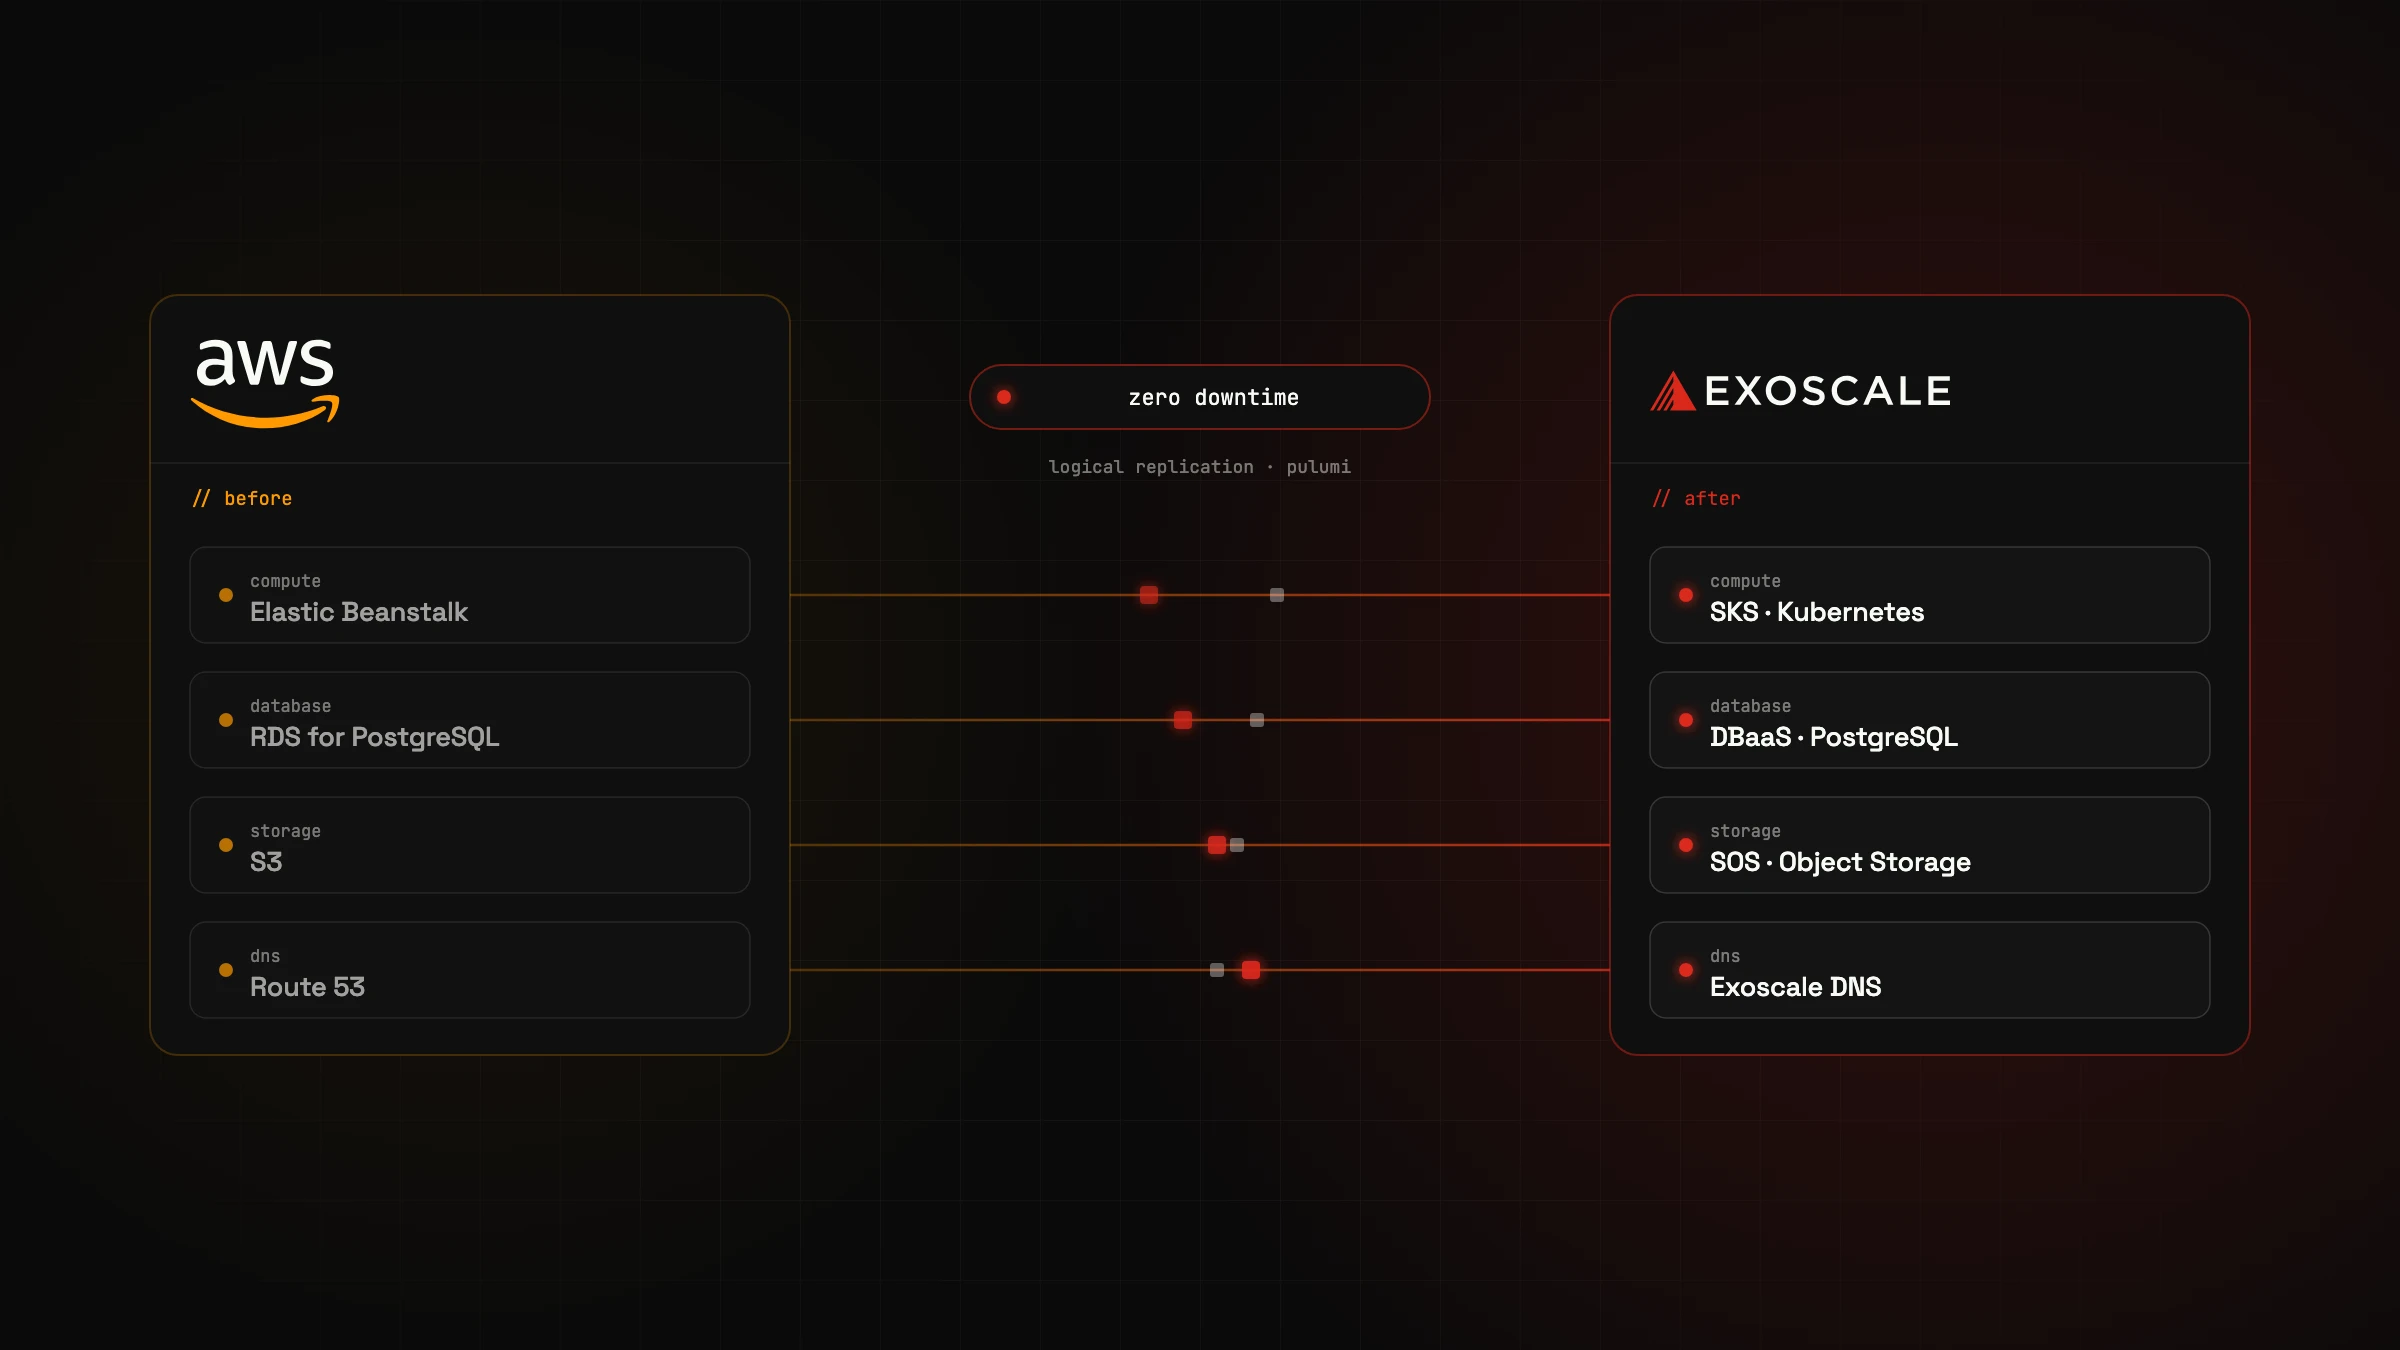
Polyglot Monorepo: How Nx, Mise, Pulumi, and Exoscale work together
Kotlin, TypeScript, Go, Rust – four languages, one repository. How the tooling works together, from the local build to the Kubernetes cluster in Vienna.
The Problem: 15 Repositories, One Product
Picture a B2B platform built up over several years. Spring Boot APIs in Kotlin, React frontends, Go services for data transfer, Rust tools for data processing. Every language, every module – in its own repository.
What initially seems manageable becomes a maintenance nightmare over time:
-
Dependency Hell: A shared library update means pull requests in every repository that depends on it. Each repo must be tested separately to see if the new version is compatible.
-
CI/CD Chaos: 15 pipelines, each configured slightly differently. When pipeline 12 fails, you spend the first half hour working out how it differs from pipeline 3.
-
Version Conflicts: "Which version of
my-shared-libis used by service X?" – a question nobody can answer without digging. And if two services use different versions, you only notice it in the test environment. -
Onboarding Effort: New developers first need to understand which repositories belong together and how they interact. "Which repo do I need to clone for feature Y? And which other repos do I need for that?"
-
"Works on my machine": Developer A has Java 17, developer B has Java 21, the CI server has Java 25. All three get different results.
The obvious objection: "A monorepo? With four different programming languages? That can't work."
It works. And the build is faster than before.
Why Nx – Even for Non-JavaScript Projects?
Nx is often perceived as a tool for Angular or React monorepos. But the core of Nx is language-agnostic. Nx does not orchestrate "JavaScript builds" – Nx orchestrates tasks. A task can be mvn package, cargo build or go build. Nx does not care.
Its strength lies in three concepts that work independently of the programming language:
Task Graphs: Nx understands dependencies between projects. If service A depends on library B, library B is automatically built first. This may sound trivial, but with 15 projects in 4 languages with mutual dependencies, manual orchestration quickly becomes impossible.
Caching: If nothing has changed in a project, it is not rebuilt. Nx calculates a hash over all relevant input files. If the inputs are identical to the last build, the result is taken from the cache – in milliseconds instead of minutes.
Affected Detection: On a git push, not all 15 projects are built, only those actually affected by the changes. If only the frontend changes, the Spring Boot server is left alone.
In practice, this means the interface stays the same, whether the project is written in Kotlin, TypeScript, Go, or Rust:
# Build everything
npx nx run-many -t build

# Test affected projects only
npx nx run-many -t test --affected --base=origin/master

# A specific build
npx nx run backend-api:build
No switching between mvn, pnpm, cargo, and go in the CI pipeline. One command for everything.
Unifying Toolchains with Mise
Before Nx can orchestrate, each language needs its toolchain. With 15 repositories, it looked like this:
-
nvmfor Node.js versions -
SDKMANfor Java and Maven -
rustupfor Rust -
goenvfor Go -
Manually installed CLIs for
kubectl,helm,pulumi, the Exoscale CLI, and half a dozen other tools
Five different version managers, five different configuration formats, five places where something can go wrong. And something regularly does: one developer has Node 18 locally, while the CI server has Node 24. Or someone forgets to update SDKMAN and builds with an old Java version. The errors are subtle and cost hours.
Mise takes a radical approach: a single file at the repository root defines all tool versions.
# mise.toml – Single Source of Truth for all tool versions
[tools]
node = "24.13.0"
java = "liberica-25.0.2"
maven = "3.9.12"
go = "1.25.7"
rust = "1.92.0"
"github:exoscale/cli" = "v1.93.0"
kubectl = "1.35.1"
helm = "4.1.1"
pulumi = "3.220.0"
aws-cli = "2.33.22"
One mise install and the entire stack is in place. Everything in the exact same versions, on every machine, in every CI pipeline.
That sounds like a small detail, but in practice, it eliminates an entire category of problems. "Works on my machine" no longer exists because there is no difference between "my machine" and the CI server.
More than a Version Manager: Infrastructure Access
Mise not only manages tool versions. Through environment variables and tasks, it becomes the central entry point for the entire development environment – including cloud access.
In our case, the entire infrastructure runs on Exoscale, a European cloud provider with data centres in Austria. Mise configures access to all Exoscale services:
[env]
# Access to Kubernetes: kubeconfig for the Exoscale SKS Cluster
KUBECONFIG = "{{config_root}}/infra/kubeconfig.yaml"

# Exoscale CLI config
EXOSCALE_CONFIG = "{{config_root}}/infra/exoscale.toml"
EXOSCALE_ACCOUNT = "MyCompany"

# AWS-compatible credentials for Exoscale S3 (SOS)
AWS_CONFIG_FILE = "{{config_root}}/infra/aws-config"
AWS_SHARED_CREDENTIALS_FILE = "{{config_root}}/infra/aws-credentials"
AWS_PROFILE = "exoscale"
Why AWS credentials for Exoscale? Because Exoscale offers S3-compatible Object Storage (SOS). Standard AWS tools like the AWS CLI, the AWS SDK, and Pulumi work directly – you just point the endpoint at Exoscale. More on this in the section about Pulumi.
The actual secrets live in a mise.local.toml, which is not checked into Git:
# mise.local.toml (git-ignored, developer-specific)
[env]
EXOSCALE_API_KEY = "EXO..."
EXOSCALE_API_SECRET = "..."
For Kubernetes access, we don't use a static token or an exported certificate but an exec credential provider. On every kubectl command, kubeconfig.yaml calls the Exoscale CLI, which generates a short-lived credential on the fly:
# infra/kubeconfig.yaml
users:
  - name: my-k8s-prod:kubernetes-admin
    user:
      exec:
        apiVersion: client.authentication.k8s.io/v1beta1
        command: exo
        args:
          - compute
          - sks
          - kubeconfig
          - my-k8s-prod
          - --zone=at-vie-1
          - --exec-credential
          - -g=system:masters
          - kubernetes-admin
        interactiveMode: Never
The advantage: no long-lived token that needs to be rotated. As long as the Exoscale credentials in mise.local.toml are valid, kubectl works – the exo CLI handles authentication in the background.
Besides tool versions, Mise can also define tasks – shell scripts that live directly in mise.toml. We use this to convert the Exoscale credentials into an AWS-compatible credentials file:
# mise.toml
[tasks.generate-aws-creds]
description = "Generate AWS credentials file from mise.local.toml env vars"
run = """
cat > {{config_root}}/infra/aws-credentials <<EOF
[exoscale]
aws_access_key_id = ${EXOSCALE_API_KEY}
aws_secret_access_key = ${EXOSCALE_API_SECRET}
EOF
"""
Running mise run generate-aws-creds reads the Exoscale secrets from mise.local.toml and writes them in AWS credentials format. The result:
# infra/aws-credentials (generated, git-ignored)
[exoscale]
aws_access_key_id = EXO...
aws_secret_access_key = ...
This allows aws s3 ls, Pulumi, and all S3-compatible tools to work with Exoscale.
Onboarding a new developer now looks like this:
git clone <repo-url>
cp mise.local.toml.example mise.local.toml     # Add secrets (since October 2026 via fnox, see below)
mise install                                   # Install all tools
mise run generate-aws-creds                    # Cloud access config
pnpm install                                   # Node dependencies
npx nx run-many -t build                       # Build all
What previously took hours now takes minutes.
Update October 2026: secrets from the password manager with fnox
One weak spot remained: the Exoscale credentials sat in plain text in mise.local.toml on every developer machine, and so did the generated aws-credentials file. Unlike AWS, where aws login creates short-lived credentials via the browser, Exoscale only offers long-lived API keys. So they have to live somewhere; the only question is where. We now fetch them straight from 1Password with fnox. fnox comes from the author of Mise and talks to password managers like 1Password and Bitwarden, to HashiCorp Vault and to the secret managers of AWS, Azure and Google Cloud.
The repository now contains an fnox.toml. It holds no secrets, only references to 1Password items, so it can go into Git:
[providers.op]
type = "1password"
vault = "Infrastructure"

[secrets]
EXOSCALE_API_KEY = { provider = "op", value = "Exoscale/api-key" }
EXOSCALE_API_SECRET = { provider = "op", value = "Exoscale/api-secret" }
Infrastructure commands run through fnox exec. fnox reads the secrets from 1Password, sets them as environment variables and starts the command:
fnox exec -- pulumi up
fnox exec -- kubectl get pods -A
Before such a command runs, 1Password asks for a fingerprint. No secret is left on disk, and without approval on the device nobody gets access to the infrastructure, not even a script running in the background. The same goes for AI agents: a coding agent finds no secrets in a file it could read and can't run an infrastructure command on its own. That always takes a human's confirmation. mise.local.toml no longer needs credentials, and onboarding no longer involves adding secrets.
Nx as a Polyglot Orchestrator: The Configuration in Detail
That sounds elegant in theory. But what does the actual configuration look like? Nx has to understand which files belong to which project – and what distinguishes a change to a pom.xml from a change to a package.json.
The Problem with npm Lock Files
Without special configuration, the following happens: A frontend developer updates an npm package. The pnpm-lock.yaml changes. Nx then marks all projects as affected – including the Go services, Rust tools, and Spring Boot APIs, which have nothing to do with npm. The whole point of the monorepo is lost: everything is rebuilt.
The solution is named inputs – language-specific definitions that tell Nx which files are relevant for which project category:
{
  "namedInputs": {
    "jvm": [
      "{projectRoot}/src/**",
      "{projectRoot}/pom.xml",
      { "externalDependencies": [] }
    ],
    "go": [
      "{projectRoot}/**/*.go",
      "{projectRoot}/go.mod",
      "{projectRoot}/go.sum",
      { "externalDependencies": [] }
    ],
    "rust": [
      "{projectRoot}/src/**",
      "{projectRoot}/Cargo.toml",
      "Cargo.lock",
      { "externalDependencies": [] }
    ],
    "typescript": [
      "{projectRoot}/src/**",
      "{projectRoot}/tsconfig*.json",
      "package.json"
    ]
  }
}
The crucial difference: the JVM, Go, and Rust inputs list "externalDependencies": [] – an empty list. This tells Nx: "This project has no npm dependencies. Changes to pnpm-lock.yaml are irrelevant." Only for TypeScript projects is this entry missing, because changes in npm packages do actually affect the build.
On top of that, a plugin configuration tells Nx to analyse the pnpm workspace structure:
{
  "plugins": [
    {
      "plugin": "@nx/js",
      "options": {
        "projectsAffectedByDependencyUpdates": "auto"
      }
    }
  ]
}
The auto setting ensures that Nx parses the pnpm-workspace.yaml and only marks projects as affected if they are actually registered in the pnpm workspace. Go, Rust, and JVM projects are not listed there – so they are not affected by npm changes.
Project Configuration: Same Structure, Different Language
Nx automatically recognises JavaScript projects by their package.json. For non-JavaScript projects, you add a project.json to the project directory – a simple JSON file that tells Nx: "Here is a project, and this is how it is built." That is the entire effort required to integrate a Maven or Cargo project into Nx.
The structure is always the same – only the commands and inputs differ by language. Two placeholders appear repeatedly: {projectRoot} points to the directory of the current project (e.g., jvm/backend-api/), {workspaceRoot} points to the monorepo root.
A Spring Boot API project:
{
  "projectType": "application",
  "targets": {
    "build": {
      "command": "mvn -B package -DskipTests",
      "dependsOn": ["my-shared-lib:mvn-install"],
      "inputs": ["jvm"],
      "outputs": ["{projectRoot}/target"]
    },
    "test": {
      "command": "mvn test",
      "inputs": ["jvm"]
    }
  }
}
A Rust project:
{
  "targets": {
    "build": {
      "command": "cargo build --release",
      "inputs": ["rust"],
      "outputs": ["{projectRoot}/target/release"]
    },
    "lint": {
      "command": "cargo clippy -- -D warnings",
      "inputs": ["rust"]
    }
  }
}
The semantics are identical everywhere: inputs defines which files invalidate the cache. outputs defines which directories are cached. dependsOn defines what must run first. It does not matter whether mvn, cargo, go, or pnpm is executed behind it.
Docker packaging is also an Nx target. It depends on build and is only executed in the CI pipeline on master and release branches:
{
  "targets": {
    "docker": {
      "command": "docker build -t $DOCKER_REGISTRY/backend-api:$BRANCH -t $DOCKER_REGISTRY/backend-api:$BRANCH-$COMMIT_SHORT . && docker push --all-tags $DOCKER_REGISTRY/backend-api",
      "dependsOn": ["build"]
    }
  }
}
Two tags per image: master (gets overwritten) and master-1fa4666 (immutable). This is important for the deployment strategy – more on this shortly.
Shared Libraries Across Language Boundaries
A monorepo shows its full value when code and definitions are shared across projects. In our setup, there are two patterns that make this advantage concrete.
Pattern 1: Shared Library Within a Language
Multiple Spring Boot services share a library. Without a monorepo, this meant a separate library in its own repository, with its own version cycle, its own CI pipeline, and manual updates in each consumer repo.
In the monorepo, the shared library simply sits next to the services:
<!-- my-shared-lib/pom.xml -->
<groupId>com.example</groupId>
<artifactId>my-shared-lib</artifactId>
<packaging>jar</packaging>
<version>0.0.0-SNAPSHOT</version>
The consumer services include the library as a regular Maven dependency. The version stays at 0.0.0-SNAPSHOT for good – there is no release cycle for the library, as it is never released separately. In the monorepo, the current state is always built:
<!-- backend-api/pom.xml -->
<dependencies>
    <dependency>
        <groupId>com.example</groupId>
        <artifactId>my-shared-lib</artifactId>
        <version>0.0.0-SNAPSHOT</version>
    </dependency>
</dependencies>
Deliberately No Maven Reactor
A tempting approach would be to put all JVM projects into a Maven multi-module project (reactor) – with a parent pom.xml that knows all modules. We deliberately decided against it.
The reason: In a polyglot monorepo, Maven is only one of four build toolchains. A reactor would squeeze the JVM projects into their own dependency structure, parallel to the graph that Nx already manages. The result would be two overlapping systems – Maven reactor for JVM-internal dependencies, Nx for everything else. This would quickly become confusing.
Instead, all JVM projects are standalone Maven projects without a common parent POM. The dependencies between them are managed solely by Nx:
{
  "implicitDependencies": ["my-shared-lib"],
  "targets": {
    "build": {
      "dependsOn": ["my-shared-lib:mvn-install"]
    }
  }
}
In the CI pipeline, Nx ensures that mvn install runs on the library before the dependent services are built. Locally, this is often not necessary: IDEs like IntelliJ are smart enough to recognise the Maven projects in the monorepo and resolve the dependencies directly – without the library being installed into the local Maven repository first. You open the monorepo in IntelliJ, and the source navigation between library and consumer works immediately.
The effect: If a developer changes something in the shared library, all dependent services are automatically rebuilt and tested in CI. In one commit. No manual version bumps, no forgotten repositories. And locally, you still have full IDE support with direct navigation and refactoring across module boundaries.
Pattern 2: Cross-Language Code Generation via API Specs
This is where it gets really exciting – and where the biggest advantage over separate repositories shows.
The scenario: The Spring Boot API defines an OpenAPI spec (api.yaml) and a GraphQL schema (schema.graphqls). A Go service generates its HTTP client from the OpenAPI spec. The React frontend generates its TypeScript types from the GraphQL schema.
With 15 repositories, the process went like this: the API developer changes the spec, commits and pushes. Then they post a message in the team chat: "Hey, I changed the API, please regenerate your clients." Maybe someone does it. Maybe someone forgets. Maybe nobody notices until the test environment breaks.
In the monorepo, this happens automatically. The spec files live in the backend project:
jvm/backend-api/
├── src/main/resources/
│   ├── api.yaml                 ← OpenAPI Spec (REST)
│   └── graphql/schema.graphqls  ← GraphQL Schema
The Go service declares the OpenAPI spec as an input to its code generation:
{
  "targets": {
    "codegen": {
      "command": "go generate ./...",
      "inputs": [
        "{workspaceRoot}/jvm/backend-api/src/main/resources/api.yaml"
      ],
      "outputs": ["{projectRoot}/internal/client/client.gen.go"]
    },
    "build": {
      "command": "go build ./cmd/service",
      "dependsOn": ["codegen"],
      "inputs": ["go"]
    }
  }
}
The frontend declares the GraphQL schema as an input:
{
  "targets": {
    "codegen": {
      "command": "pnpm codegen",
      "inputs": [
        "{workspaceRoot}/jvm/backend-api/src/main/resources/graphql/**"
      ],
      "outputs": ["{projectRoot}/src/graphql/generated"]
    },
    "build": {
      "dependsOn": ["codegen"]
    }
  }
}
What happens now if a developer changes the api.yaml?
Through the inputs configuration, Nx detects that a file referenced by several projects has changed. The resulting cascade:
-
backend-api:buildis triggered – the API itself is rebuilt and tested with the modified spec. -
go-service:codegenis triggered –go generategenerates a new HTTP client from the updated spec. -
go-service:buildfollows automatically (becausedependsOn: ["codegen"]) – the Go service is compiled with the new client. If the new client does not match the existing code, the build fails here. -
frontend:codegenis triggered – the TypeScript types are generated from the updated schema. -
frontend:buildfollows automatically – the frontend is compiled with the new types. TypeScript errors become immediately visible.
All in one git push. No manual "Please regenerate the clients" in a Slack channel. No forgotten repository that still uses the old spec version. If the build is green, all clients are in sync. If it is red, you know immediately where the incompatibility lies.
That is the difference a monorepo makes: the API spec is the single source of truth, and the build system ensures that no consumer can drift away from it.
Affected Detection: Only Build What Changes
The greatest performance gain comes from affected detection. The principle is simple: Instead of building and testing all 15 projects with each git push, the pipeline determines exactly which projects are affected by the changes in the current commit.
On a typical workday, perhaps two or three projects change. Without affected detection, the pipeline still builds all 15 – including the Rust tools and Go services that haven’t been touched in weeks. This wastes time and CI resources.
The logic in the pipeline:
# Detect affected projects
if [ -n "$PR_DESTINATION_BRANCH" ]; then
  # Pull Request: Compare with destination branch
  BASE="origin/$PR_DESTINATION_BRANCH"
else
  # Master/Release: Compare with previous commit
  BASE="HEAD~1"
fi

# Nx calculates the dependency graph and prints affected projects only
npx nx show projects --affected --base=$BASE | \
  xargs -I {} touch affected/{}

# Affected projects as comma-separated list
AFFECTED=$(ls affected/ | tr '\n' ',' | sed 's/,$//')

# Build and test affected projects only
npx nx run-many -t lint build --projects="$AFFECTED"
npx nx run-many -t test --projects="$AFFECTED"
What does nx show projects --affected do? Nx compares the current state with the base commit and determines which files have changed. It then checks the inputs configuration of each project to see if the changed files are relevant. It also considers the dependency graph: If the shared library changes, all services depending on it are automatically affected.
The marker-file pattern (touch affected/{project}) creates a file per affected project in the filesystem. This has worked well in practice because these markers can be read in later pipeline steps – for example, to decide which Docker images need to be built and pushed.
The Difference in Numbers in the CI Pipeline
| Scenario | 15 Repos (before) | Monorepo (after) |
|---|---|---|
| Change in a single project | ~5 min (single build) | ~5 min (only this project) |
| Change in shared library | ~40 min (dependent repos updated by hand) | ~10 min (automatically, in parallel) |
| Dependency update (npm) | ~60 min (all Node repos) | ~10 min (only affected TS projects) |
| Nx cache hit | not possible | ~30 sec (nothing is built) |
The monorepo build is faster in most scenarios because it builds less – even though it contains more projects.
Caching Strategy
Affected detection determines which projects are built. Caching determines whether they actually need to be built.
Nx computes a hash over all inputs for each target: source files, configuration files, dependencies. If the hash is identical to the last successful build, the cached result is used – the build command is not executed at all.
In the CI pipeline, along with the Nx cache, language-specific caches are configured to avoid re-downloading all Maven artifacts or npm packages with each run:
caches:
  nx: .nx/cache                      # Nx build results
  maven: ~/.m2/repository            # Maven artifacts
  pnpm: .pnpm-store                  # npm packages
  mise: ~/.local/share/mise/installs # tool installations
Not everything is cached. Docker builds are deliberately excluded because a cached Docker image can lead to deploying an outdated version. The same goes for serve (dev server) and clean – targets where caching makes no sense.
Remote Cache: Share Build Results
Locally and in the CI pipeline, the Nx cache already saves a lot of time. But the real payoff comes with a remote cache: build results are stored centrally and shared across all developers and CI runs.
The principle: Developer A builds backend-api locally. The result is stored in the remote cache. If Developer B – or the CI pipeline – builds the same project with the same inputs, the result is fetched directly from the cache. With 15 projects averaging several minutes of build time per project, this saves a great deal of time.
Nx offers Self-Hosted Remote Caching with an S3-compatible storage backend. And since Exoscale SOS is S3-compatible, the pieces fit: the remote cache can reside in the same Exoscale account as the rest of the infrastructure – no external caching service, no data leaving the company.
Infrastructure as Code with Pulumi on Exoscale
So far, this has been about code, builds, and tests. But a product also has to run somewhere. In our case, the entire infrastructure runs on Exoscale – defined as Infrastructure as Code with Pulumi.
Why Exoscale?
Exoscale is a European cloud provider with data centres in Austria and across the EU. For projects with GDPR requirements or a desire for data sovereignty, this is a crucial advantage over AWS, Azure, or GCP: the data never leaves European jurisdiction.
What many find surprising: Exoscale offers a complete platform that provides all the building blocks for a modern cloud architecture. Managed Kubernetes, S3-compatible Object Storage, Managed PostgreSQL, Container Registry – everything needed for a production environment. Without the complexity of 200+ AWS services but also without the limitations of simple hosting solutions.
Why Pulumi instead of Terraform?
Pulumi defines infrastructure in real programming languages – in our case, TypeScript. That means no new DSL to learn, IDE support with autocomplete, and loops, conditions, and functions instead of copy and paste.
Kubernetes: Exoscale SKS
Exoscale SKS (Scalable Kubernetes Service) is a fully managed Kubernetes cluster. In Pulumi:
const cluster = new exoscale.SksCluster("k8s-prod", {
  zone: "at-vie-1",        // Data center - Zone Vienna
  name: "my-k8s-prod",
  version: "1.35.0",
  serviceLevel: "pro",
  cni: "calico",
  exoscaleCcm: true,        // Cloud Controller Manager
  metricsServer: true,
});

const nodepool = new exoscale.SksNodepool("prod-pool", {
  zone: "at-vie-1",
  clusterId: cluster.id,
  size: 3,
  instanceType: "standard.large",
});
In addition, anti-affinity groups can ensure that the nodes run on different physical hosts.
Object Storage: S3-Compatible, but European
Exoscale SOS (Simple Object Storage) is API-compatible with AWS S3. That’s the key: the same code, the same SDKs, the same tools – but the data stays in Vienna instead of Virginia.
In Pulumi, we use the standard AWS provider. The only difference from AWS: the endpoint.
const sosProvider = new aws.Provider("exoscale-sos", {
  region: "at-vie-1",
  accessKey: exoscaleApiKey,
  secretKey: exoscaleApiSecret,
  endpoints: [{ s3: "https://sos-at-vie-1.exo.io" }],
  skipCredentialsValidation: true,
  skipRegionValidation: true,
  skipMetadataApiCheck: true,
});

const bucket = new aws.s3.BucketV2("app-data", {
  bucket: "my-app-prod",
}, { provider: sosProvider });
The skip flags are necessary because Exoscale is not AWS – there is no AWS metadata service and no AWS regions. But everything regarding S3 operations (upload, download, presigned URLs, versioning) works identically.
The same approach also works locally via the AWS CLI:
aws s3 ls --profile exoscale --endpoint-url https://sos-at-vie-1.exo.ioManaged PostgreSQL
const db = new exoscale.Database("postgres-prod", {
  zone: "at-vie-1",
  name: "my-db-prod",
  type: "pg",
  plan: "business-4",
  pg: {
    version: "18",
    backupSchedule: "04:00",
    ipFilter: [...allowedIps],
  },
  terminationProtection: true,
});
Automatic backups, IP filtering, termination protection – all declaratively defined in Pulumi, versioned in Git.
Pulumi State: Also on Exoscale
A frequently overlooked detail: where does the Pulumi state – that is, the complete state of the infrastructure – live? By default, it’s on Pulumi Cloud (based in the US) or in an AWS S3 bucket.
In our setup, the state lives in an Exoscale SOS bucket:
pulumi login s3://my-pulumi-state?endpoint=https://sos-at-vie-1.exo.ioSo the whole chain stays in Europe: the code, the infrastructure definition, the infrastructure state and the running services.
From Git Push to Kubernetes: The Complete Pipeline
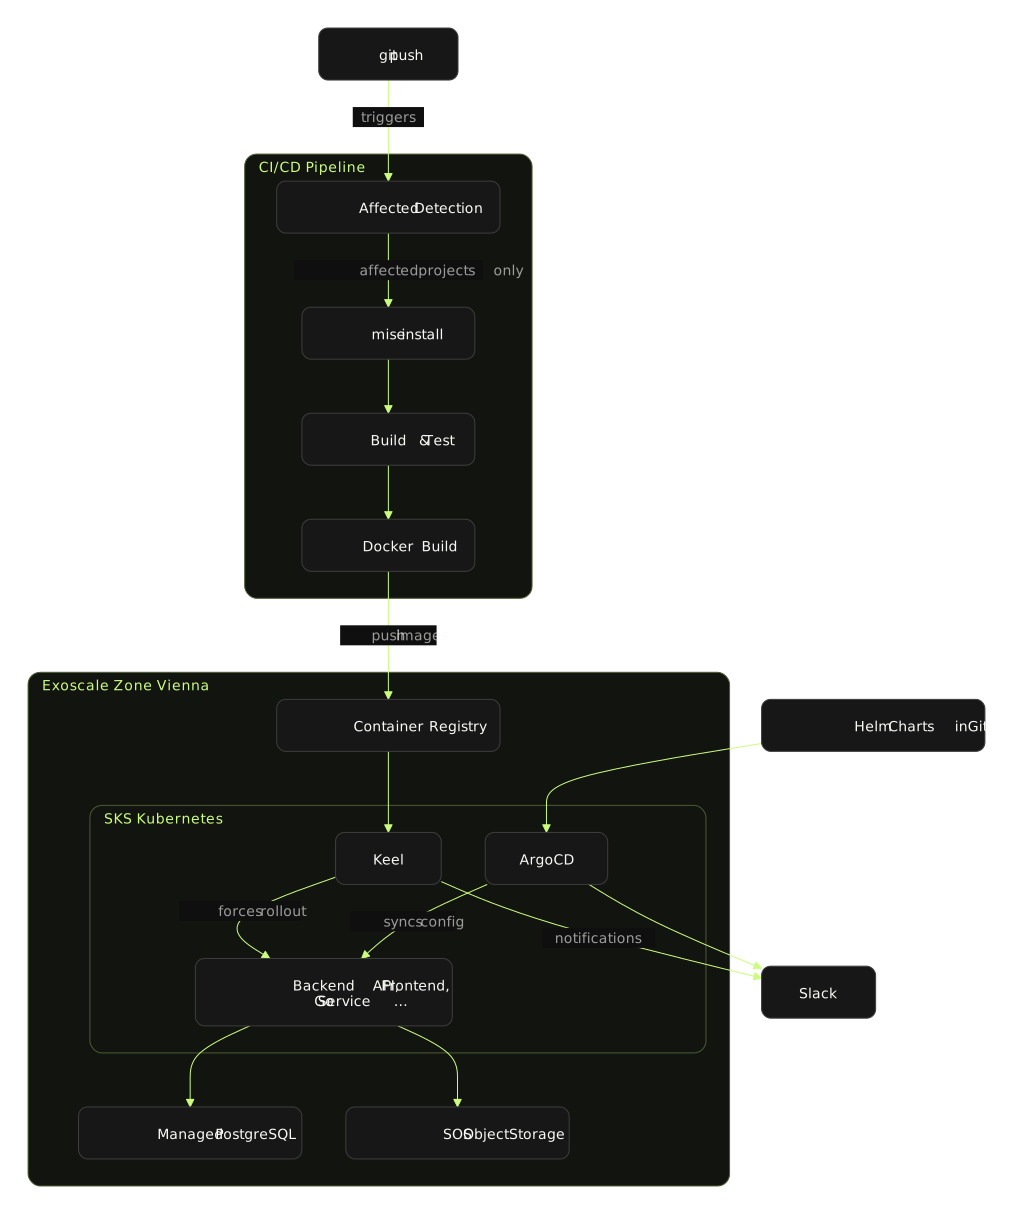
Now for the big picture. What happens between a developer pushing code and the application running on the Kubernetes cluster in Vienna?
Step by Step
1. Git Push: A developer pushes to the master branch.
2. Affected Detection: The CI pipeline determines via nx show projects --affected which of the 15 projects are affected. If only frontend files have changed, not a single JVM or Go build is triggered.
3. Mise Install: All the required tools are installed via Mise. Thanks to the CI cache, it only takes seconds after the first run.
4. Build & Test: Nx runs lint, build, and test in parallel for all affected projects. Non-affected projects are skipped. Cached results are reused.
5. Docker Build & Tag: Docker images are created only for affected, containerised services. Each image gets two tags: the branch name (master) and a unique version (master-1fa4666). The branch tag is overwritten with each build, while the commit tag remains immutable.
6. Push to Exoscale Container Registry: The images are pushed to the private container registry on Exoscale. Exoscale offers its own registry – no Docker Hub, no AWS ECR needed.
7. Keel detects new images (Test/Staging): This is where an important detail comes in: in the test environment, the Kubernetes deployments point to a pinned tag – e.g., image: backend-api:master. ArgoCD alone would not trigger an update because the tag in the Helm charts does not change – it remains master. But the content behind the tag is new. Keel solves exactly this problem: it monitors the container registry, recognises that master points to a new digest, and forces a rollout in the cluster.
8. ArgoCD for Configuration and Production: ArgoCD monitors a GitOps repository with Helm charts. Infrastructure changes – new environment variables, changed resource limits, additional services – are controlled through Git commits. In production, explicit image versions are also set (e.g., image: backend-api:master-1fa4666) so that deployments are deliberate and traceable.
Two clusters – test (automatically via Keel) and production (explicit versions via ArgoCD) – ensure that every change is first validated automatically in the test environment before being deliberately promoted to production.
The Result
After consolidating 15 repositories into a polyglot monorepo:
-
Build times reduced by 60–80% – not through faster hardware, but because affected detection and caching only build what has actually changed.
-
Onboarding reduced from hours to minutes –
git clone,mise install,pnpm install, done. No more "What Java version do I need again?" -
API changes cannot be forgotten – if the OpenAPI spec changes, all clients in Go and TypeScript are automatically regenerated. The build fails before incompatible code enters the test environment.
-
Atomic changes across language boundaries – one commit can change the API, the Go client, and the TypeScript frontend simultaneously. In 15 separate repos, these would have been three coordinated pull requests.
-
Operations in Europe – from the Pulumi state to the container registry to the database, everything runs on Exoscale in Vienna.
Conclusion
The combination of Nx, Mise, Pulumi, and Exoscale adds up to a development and operations stack on European infrastructure:
-
Nx orchestrates the build across all languages – whether Kotlin, TypeScript, Go, or Rust.
-
Mise unifies the entire toolchain in one file – including cloud access to Exoscale.
-
Pulumi defines the infrastructure as TypeScript code – traceable, versioned, reviewable.
-
Exoscale provides the European cloud platform – with managed Kubernetes, S3-compatible storage, PostgreSQL, and container registry.
Infrastructure, state and operations sit with a European provider in Vienna, not on AWS, Azure or Google Cloud.
We help companies build exactly this kind of architecture – from monorepo migration and infrastructure as code to day-to-day operation on the sovereign EU cloud. Learn more →
Got a similar project in mind?
In a free initial call we look at your situation and tell you what's realistic and what the next step looks like.

// about the author
Alexander J. Gassner, MSc
Founder and managing director of agsolutions, with more than 15 years in software development (MSc Software Engineering, FH Hagenberg). Builds and runs business-critical software from requirements to operations: Kotlin, Spring Boot and React in the code, Kubernetes, Pulumi and GitOps in operations, as an Exoscale Certified Solution Architect.